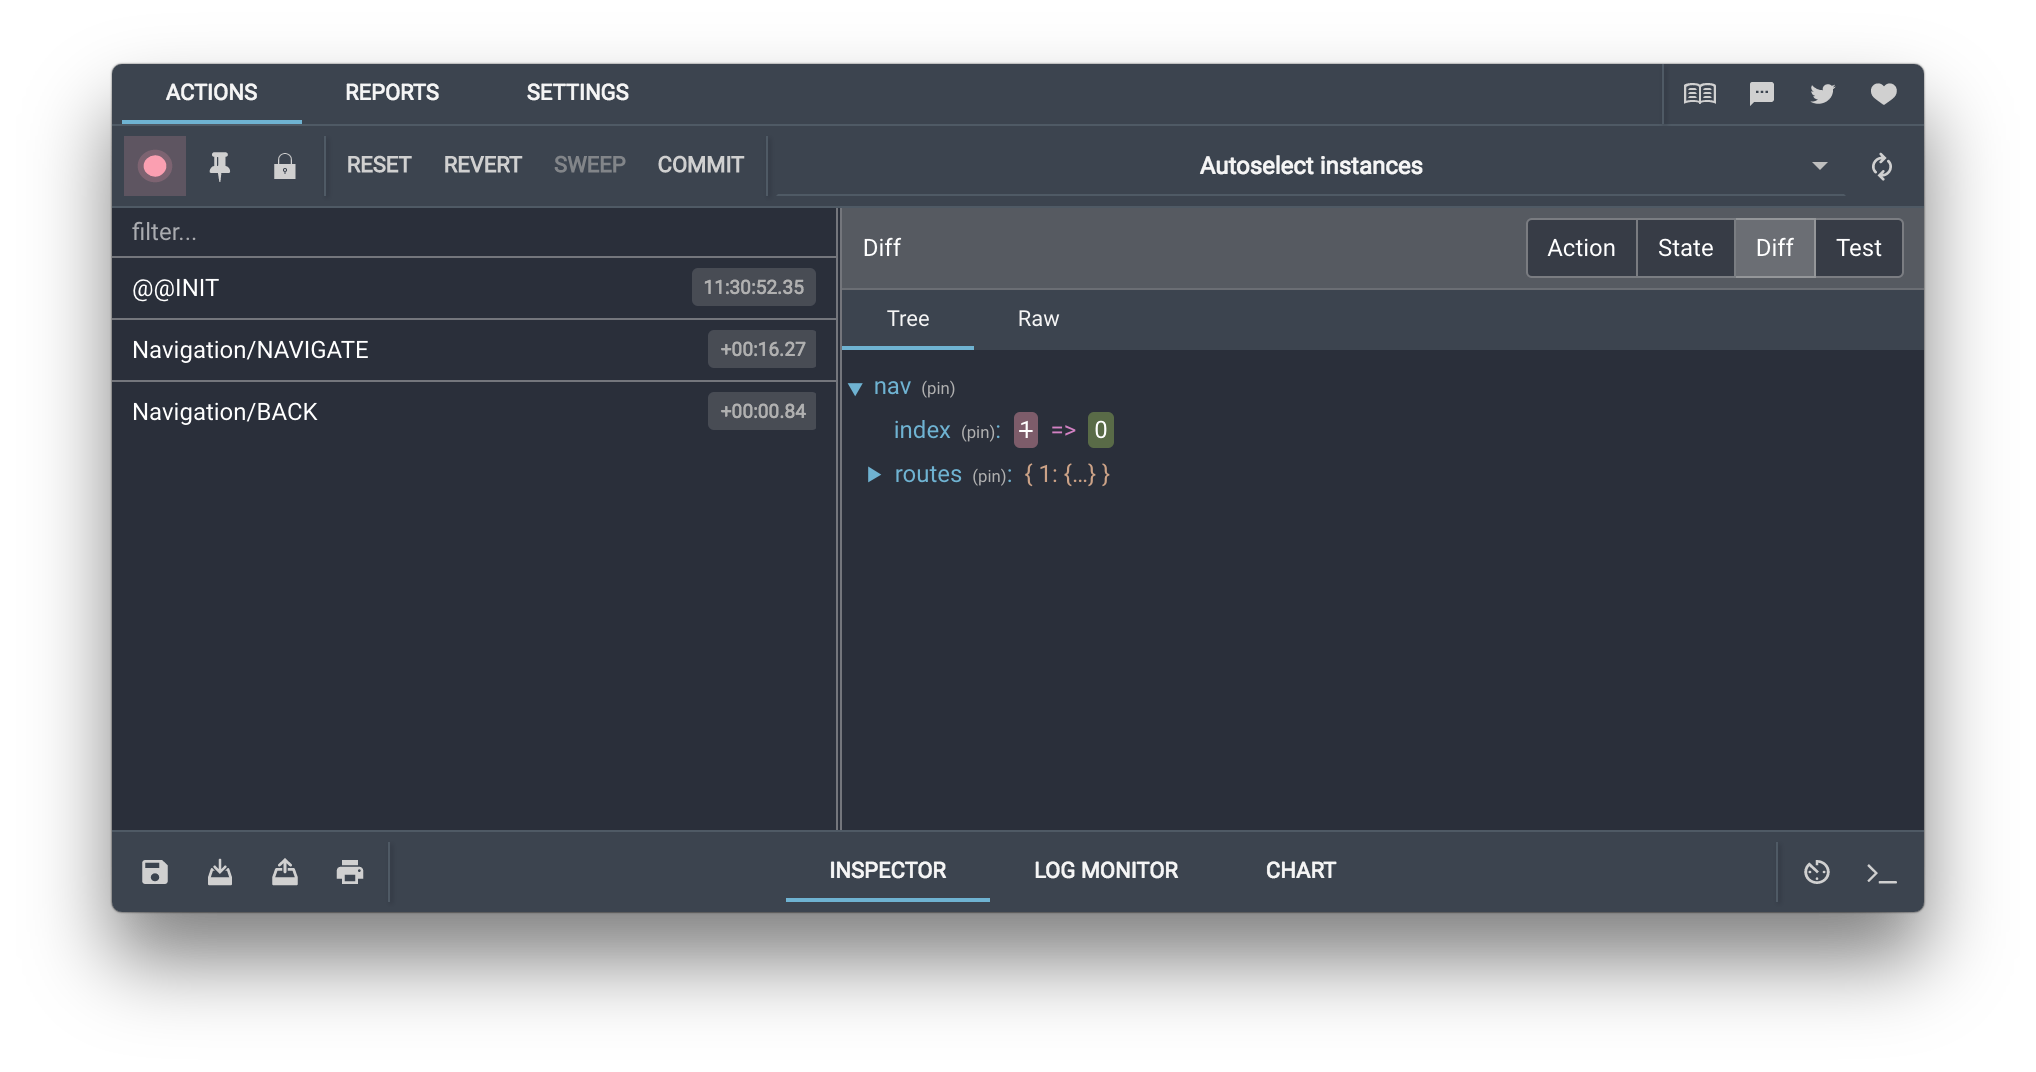
最近朋友問我關於 Redux 的問題,但我已經有兩年沒碰 React 了。所以藉此機會找了 youtube 上的教程,好好複習一次。
Redux
- Redux 透過單向數據流模型來管理狀態,幫助應用程式擴展規模


Redux Flow
Redux Flow 有個儲存所有狀態 (State) 的倉庫 (Store),頁面會依據這些狀態 (State) 產生對應的介面 (UI)。當使用者對介面 (UI) 觸發動作 (Actions) 時,動作 (Actions) 會把使用者所做的事情 (payload) 傳輸給處理器 (Reducer) 做運算, 處理器 (Reducer) 處理完後變會把倉庫 (Store) 裡的狀態 (State) 更新,所以頁面就會再依據狀態 (State) 的改變產生對應的新介面 (UI)。

安裝
打下列指令安裝 React App。
1
| npx create-react-app redux-tutorial
|
誒?為什麼是 npx 呢?那是什麼?
所以我去搜尋了npx 使用教程如下。
除了調用項目內部模塊,npx 還能避免全局安裝的模塊。比如,create-react-app 這個模塊是全局安裝,npx 可以運行它,而且不進行全局安裝。上面代碼運行時,npx 將create-react-app下載到一個臨時目錄,使用以後再刪除。所以,以後再次執行上面的命令,會重新下載create-react-app。
意思就是他不會在你電腦安裝 create-react-app 這個項目呦~幫你產生好專案後,就會自動移除不佔空間。
接下來進入專案,安裝 Redux。
1
| yarn add redux react-redux
|
將專案啟動檢查有沒有安裝成功。
起成功的話會看到瀏覽器自動開啟頁面如下圖。頁面上會提示去修改 src/App.js 就會自動 reload 畫面。

創建 Store
createStore
教程在 index.js 先創建了簡易的 store。Git#1
1
2
3
4
5
6
7
8
9
10
11
12
13
14
15
16
17
18
19
20
21
22
23
24
25
26
27
28
29
30
31
32
33
34
35
| ...
import { createStore } from 'redux';
function reducer(state, action) {
if (action.type === '_changeState') {
return action.payload.newState;
}
return 'state';
}
const store = createStore(reducer);
console.log(store.getState());
const action = {
type: '_changeState',
payload: {
newState: 'New State'
}
};
store.dispatch(action);
console.log(store.getState());
...
|
combineReducers
當有兩個以上的 Reducers 時,在 index.js 做合併。 Git#2
1
2
3
4
5
6
7
8
9
10
11
12
13
14
15
16
17
18
19
20
21
22
23
24
25
26
27
28
29
30
31
32
33
34
35
36
37
38
39
40
41
42
43
44
45
46
| ...
import { createStore, combineReducers } from 'redux';
function productsReducer(state = [], action) {
return state;
}
function userReducer(state = '', {type, payload}) {
switch (type) {
case 'updateUser':
return payload.user;
}
return state;
}
const allReducers = combineReducers({
products: productsReducer,
user: userReducer
});
const store = createStore(
allReducers,
{
products: [{ name: 'iPhone' }],
user: 'Anny Chang'
},
window.__REDUX_DEVTOOLS_EXTENSION__ && window.__REDUX_DEVTOOLS_EXTENSION__()
);
const updateUserAction = {
type: 'updateUser',
payload: {
user: 'John'
}
}
store.dispatch(updateUserAction);
ReactDOM.render(<Provider store={store}><App /></Provider>, document.getElementById('root'));
...
|
Reducers and Actions
將 Reducers 和 Actions 從 index.js 中抽離。Git#3
Actions
在 src/acitons/ 新增 user-actions.js 和 products-actions.js。
user-actions.js
1
2
3
4
5
6
7
8
9
10
11
|
export const UPDATE_USER = 'users:updateUser';
export function updateUser (newUser) {
return {
type: UPDATE_USER,
payload: {
user: newUser
}
}
}
|
Reducers
在 src/reducers/ 新增 user-reducer.js 和 products-reducer.js。
user-reducer.js
1
2
3
4
5
6
7
8
9
10
11
|
import { UPDATE_USER } from '../actions/user-actions'
export default function userReducer(state = '', {type, payload}) {
switch (type) {
case UPDATE_USER:
return payload.user;
default:
return state;
}
}
|
View
App.js
1
2
3
4
5
6
7
8
9
10
11
12
13
14
15
16
17
18
19
20
21
22
23
24
25
26
27
28
29
30
31
32
33
34
35
36
37
38
39
40
41
42
43
44
45
46
47
48
49
50
51
52
53
54
55
56
57
58
59
60
61
62
63
| import React, { Component } from 'react';
import logo from './logo.svg';
import './App.css';
import { connect } from 'react-redux';
import { updateUser } from './actions/user-actions'
class App extends Component {
constructor(props) {
super(props);
this.onUpdateUser = this.onUpdateUser.bind(this);
}
onUpdateUser(event) {
this.props.onUpdateUser(event.target.value);
}
render() {
return (
<div className="App">
<header className="App-header">
<img src={logo} className="App-logo" alt="logo" />
<p>
Edit <code>src/App.js</code> and save to reload.
</p>
<p>Practice by Anny Chang</p>
<a
className="App-link"
href="https://reactjs.org"
target="_blank"
rel="noopener noreferrer"
>
Learn React
</a>
<h1>
<input onChange={this.onUpdateUser}></input>
<br/>
{this.props.user}
</h1>
</header>
</div>
);
}
}
const mapStateToProps = state => ({
products: state.products,
user: state.user
});
const mapActionsToProps = {
onUpdateUser: updateUser
};
export default connect(mapStateToProps, mapActionsToProps)(App);
|
Redux-thunk
當我們在接取 API 非同步的請求時,就需要 Redux-thunk 這個 middleware,幫助 Promise 回傳過後可以在 dispatch 其他的 Action。Git#4
安裝 redux-thunk。
在 index.js 引用 thunk。
1
2
3
4
5
6
7
8
9
10
11
12
13
14
15
16
17
18
19
20
21
22
23
| ...
import thunk from 'redux-thunk';
import { applyMiddleware, compose, createStore, combineReducers } from 'redux';
...
const allStoreEnhancers = compose (
applyMiddleware(thunk),
window.__REDUX_DEVTOOLS_EXTENSION__ && window.__REDUX_DEVTOOLS_EXTENSION__()
);
const store = createStore(
allReducers,
{
products: [{ name: 'iPhone' }],
user: 'Anny Chang'
},
allStoreEnhancers
);
...
|
Actions
user-actions.js
1
2
3
4
5
6
7
8
9
10
11
12
13
14
15
16
17
18
19
20
21
22
23
24
25
26
27
28
29
30
31
32
33
34
| import axios from 'axios';
...
export const SHOW_ERROR = 'users:showError';
...
export function showError () {
return {
type: SHOW_ERROR,
payload: {
user: 'ERROR!!'
}
}
}
export function apiRequest() {
return dispatch => {
axios({
method: 'GET',
url: 'http://google.com'
}).then(response => {
console.log('SUCCESS');
dispatch(updateUser(response.newUser));
}).catch(response => {
console.log('ERROR');
dispatch(showError());
})
}
}
|
Reducers
user-reducer.js
1
2
3
4
5
6
7
8
9
10
11
12
| import { UPDATE_USER, SHOW_ERROR } from '../actions/user-actions'
export default function userReducer(state = '', {type, payload}) {
switch (type) {
case UPDATE_USER:
return payload.user;
case SHOW_ERROR:
return payload.user;
default:
return state;
}
}
|
View
App.js
1
2
3
4
5
6
7
8
9
10
11
12
13
14
15
16
17
18
19
20
21
22
23
24
25
26
27
28
29
| ...
import { updateUser, apiRequest } from './actions/user-actions'
class App extends Component {
constructor(props) {
...
}
componentDidMount () {
this.props.onApiRequest();
}
...
render() {
...
}
}
...
const mapActionsToProps = {
onUpdateUser: updateUser,
onApiRequest: apiRequest
};
export default connect(mapStateToProps, mapActionsToProps)(App);
|
Reselect
使用者每次都會透過 action 去做 dispatch 進而改變 state 的值。那麼,問題來了,如果需要的計算量比較大,每次更新的重新計算就會造成性能的問題。為了避免不必要的計算,Reselect 就是來解決此問題。Git#5
如果有用過 Vue 的話,就類似 computed 的功能。
Selectors 的特點為:
Selectors 可以用來計算延伸的資料,允許 Redux 去儲存最低限度的 state。也就是說,state 只儲存原始的基本資料,中間延伸的計算透過 Selector 呈現即可。
Selectors 很有效率。一個 selector 只會在與他相關的變數有改變的時候才會重新計算。
Selectors 可以多個組合。可被其他的 selectors 當作變數來運用。
這邊解釋就不用影片中的範例,因為我覺得官方提供的 example 解釋更為貼切。
1
2
3
4
5
6
7
8
9
10
11
12
13
14
15
16
17
18
19
20
21
22
23
24
25
26
27
28
29
30
31
32
33
34
35
36
37
38
39
40
| import { createSelector } from 'reselect'
const shopItemsSelector = state => state.shop.items
const taxPercentSelector = state => state.shop.taxPercent
const subtotalSelector = createSelector(
shopItemsSelector,
items => items.reduce((acc, item) => acc + item.value, 0)
)
const taxSelector = createSelector(
subtotalSelector,
taxPercentSelector,
(subtotal, taxPercent) => subtotal * (taxPercent / 100)
)
export const totalSelector = createSelector(
subtotalSelector,
taxSelector,
(subtotal, tax) => ({ total: subtotal + tax })
)
let exampleState = {
shop: {
taxPercent: 8,
items: [
{ name: 'apple', value: 1.20 },
{ name: 'orange', value: 0.95 },
]
}
}
console.log(subtotalSelector(exampleState))
console.log(taxSelector(exampleState))
console.log(totalSelector(exampleState))
|
Smart VS Dumb Component
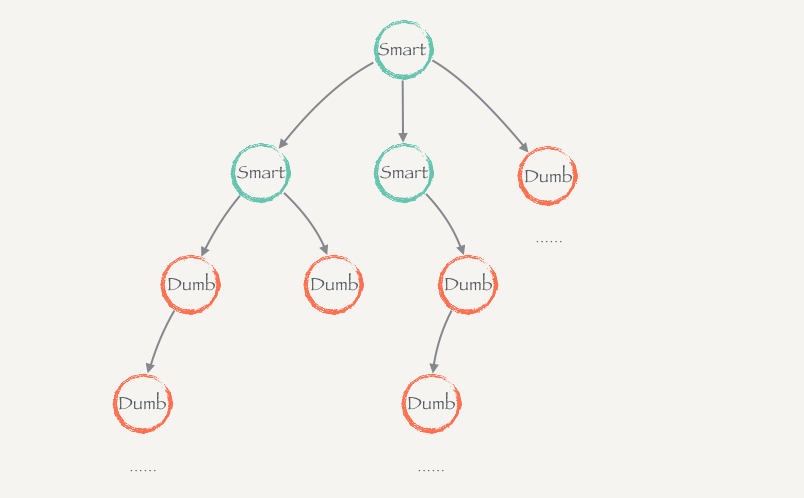
你不可能把每個子 component 都跟 Store 做聯繫,這樣很累且是過度使用。所以我們就會有一個專門和 Store 做聯繫的 Component,也就是 Smart Component。他接到資料後會往下傳給只吃 prop 的 Dumb Component。如此一來我們就能保持只有少數 Smart Component 控制 Store,而底下的 Dumb Component 因為只吃 prop 傳進來的值,所以也可安心的重複使用。
Smart VS Dumb Component 的概念是通用的理論,並不是 React 獨有。所以同樣的概念也適用在 Vue 和 Angular 等框架上。

參考資料


